I've moved! Follow me over to The Balanced Baker.


Showing posts with label Cake. Show all posts

Tuesday, February 14, 2012

Valentine’s Pound Cake

IMG_0010cc


I'm mildly obsessed with baking a surprise shape into a cake or cupcakes. I can envision something for almost every occasion - shamrocks for St. Patrick's Day, bunnies for Easter, stars for the 4th of July (or Rachel Berry), pumpkins for Halloween, and of course, hearts for Valentine's Day. I am only limited by my horrible 3-dimensional carving skills or my supply of mini cookie cutters. Cupcakes are easy because you can use the cookie cutters to create your cake inserts, but baking into a cake takes more... artistic talent.

IMG_0009cc

A heart shape is relatively easy to carve free-hand, and since I chose pound cake as a medium, all I needed was one long piece of cake for carving. To make this cake, I first baked one pound cake with enough red food coloring to make it pink. I let it cool completely, and froze it to help make it stiffer for carving. Then I carved out the heart shape with a good knife. I prepared the batter for a second pound cake, and inserted the pink heart cake into the batter before putting it in the oven. Pound cake is supposed to rise a bit in the oven, so you might not be able to completely cover the pink heart cake with the batter for the second cake. Mine started out covered, but the batter melted down and evened out before starting to rise. In the end, some of the heart cake was poking out the top, but I almost preferred the look of that part of the cake, once sliced. I was very happy with the way it turned out, and it was a huge hit at the Valentine's Day Tea that I attended! IMG_0007cc

This is a cute way to celebrate Valentine's Day. A classic pound cake with a heart baked in the middle, served with strawberries and whipped cream is sure to be a hit!

Valentine's Pound Cake

Valentine's Pound Cake Source: Baking Illustrated
Yield: Serves 12
Preparation time: 20 minutes
Cook time: 70-80 minutes
Total time: 1 hour, 30 minutes

Ingredients

  • 16 tablespoons unsalted butter (2 sticks), softened but still cool
  • 1 1/3 cups sugar (9 1/3 ounces)
  • 3 large eggs, at room temperature
  • 3 large egg yolks, at room temperature
  • 1 1/2 teaspoons vanilla extract
  • 1 1/2 teaspoons water
  • 1/2 teaspoon salt
  • 1 1/2 cups plain cake flour (6 ounces) (note: Bridget recommends adding 1/2 teaspoon baking powder. I definitely would have done so if I'd see her post before making this.)

Instructions

  1. Adjust an oven rack to the middle position and heat the oven to 325 degrees F. Grease a 9 by 5-inch loaf pan ( 7.5 cup capacity). Fit a sheet of foil or parchment paper lengthwise in the bottom of the greased pan, pushing it into the corners and up the sides. Fit a second sheet crosswise in the pan in the same manner.
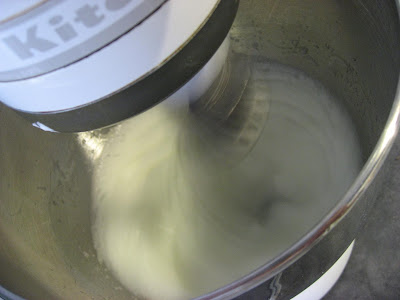
  2. Beat the butter in the bowl of a standing mixer at medium-high speed until smooth and shiny, about 15 seconds. With the machine still on, sprinkle the sugar in slowly, taking about 30 seconds. Beat the mixture until light, fluffy, and almost white, 4 to 5 minutes, stopping the mixer once or twice to scrape down the sides of the bowl with a rubber spatula.
  3. Stir together the eggs, yolks, vanilla, and water in a 2-cup liquid measuring cup. With the mixer running at medium-high speed, add the egg mixture to the buter and sugar in a very slow, thin stream. Finally, beat in the salt.
  4. Place 1/2 cup flour in a sieve and sift it over the batter. Fold gently with a rubber spatula, scraping up from the bottom of the bowl, until the flour is incorporated. Repeat twice more, adding flour in 1/2-cup increments.
  5. Scrape the batter into the prepared pan, smoothing the top with a spatula or wooden spoon. Bake until a toothpick or thin skewer inserted into the crack running a long the top comes out clean, 70 to 80 minutes. (I found it did not take this long in my oven. 60 minutes was enough for mine, so check early!) Let the cake rest in the pan for 5 minutes, then invert onto a wire rack. Place a second wire rack on the cake bottom, then turn the cake top-side up. Cool to room temperature, remove and discard the foil, and serve. If not served immediately, wrap the cake in plastic, then in foil. Store the cake at room temperature.

    Friday, November 4, 2011

    Carrot Cake Comparison

    Today, I am honored to be recognized by a fellow food blogger, Jen of The Beantown Baker. She's included me in her (fabulous) Friday Favs series!  Hop on over to her blog to see the results of my carrot cake comparison!

    IMG_1179c

    Friday, March 11, 2011

    Vanilla Bean Cake

    In 2007 after we moved to the Chicago area, I started a job that allowed me a 4 day work week. I jumped at the chance to have that schedule, since I had a long commute and it meant saving wear and tear on my car, and making a dent in the gas bill. However, when you combine 3 day weekends + a husband with a demanding job + not being close to family or friends... you get a whole lot of free time.

    CRW_0080c

    I dove into cooking, then blogging, then cooking groups like TWD and BB. I filled my weekends with trying new recipes and new techniques, hoping to find favorites that I could someday share with someone other than my husband.

    Last year we moved back to the east coast, little more than an hour from where I grew up. When it was time to plan our son's baptism, I knew right away that I wanted to make the cake. This is what I'd been working towards - years of building experience in the kitchen, so I could share the fruits of that labor with family and friends!

    CRW_0007cn

    For this cake, I pulled from some old favorites, tried new recipes, and built my first stacked cake! I was really happy with how it came out, considering how rushed I was putting it together.  The top section is a 6-inch, triple layer cake made with Beatty's Chocolate Cake (water instead of coffee, though) and chocolate mousse filling.  The bottom was a 9-inch, triple layer cake made with vanilla bean cake and raspberry filling.  I also made Swiss Meringue Buttercream for the first time for this cake, and loved it!  I'll be posting that recipe once I work out some kinks that I had with it.

    This vanilla bean cake recipe was perfect. Fluffy, moist cake with great vanilla flavor - I couldn't get enough!  This is definitely my new favorite white cake recipe.  I made 1.5 times the below recipe to have enough for three 9-inch layers. 

    Vanilla Bean Cake


    Vanilla Bean Cake

    Source: Reworded from Confections of a Foodie Bride
    Yield: Two 8 or 9-inch cake layers
    Preparation time: 25 minutes
    Cook time: 45 minutes
    Total time: 1 hour 10 minutes


    Ingredients

    • 3 cups cake flour
    • 1 tablespoon baking powder
    • 1/2 teaspoon salt
    • 1 vanilla bean, split and scraped
    • 1 cup unsalted butter, cubed and softened to room temperature
    • 2 cups sugar
    • 5 large eggs
    • 1 1/4 cups buttermilk, at room temperature
    • 2 teaspoons vanilla extract

    Instructions

    1. Preheat oven to 350. Butter and line two 8-inch or 9-inch baking pans with parchment paper. Set aside.
    2. In a medium bowl, sift together the flour, baking powder, and salt. Place butter in the bowl of a stand mixer, fitted with a paddle attachment. Split and scrape the vanilla pod into the butter, discard pod (or reserve for another use). Beat for 3 minutes on medium-high speed until the butter is light and creamy in color. Stop and scrape the bowl. Cream the butter for an additional 60 seconds.
    3. Add the sugar, 1/4 cup at a time, beating 1 minute after each addition. Scrape the sides of the bowl before each addition. Add the eggs one at a time. Reduce the mixer speed. Stir vanilla into the buttermilk. Add the dry ingredients alternately with the buttermilk. Mix just until incorporated. Scrape the sides of the bowl and mix for 15 seconds longer.
    4. Spoon the batter into the prepared pan and smooth the top with an off-set spatula. Lift up the pan with the batter, and let it drop onto the counter top a couple of times to burst any air bubbles and allowing the batter to settle. Center the pans onto the lower third of the oven and let bake 45 to 50 minutes or until the cake is lightly brown on top and comes away from the sides of the pan and a skewer inserted in the center comes out with moist crumbs attached.  I found that 45 minutes was too long for my cake and ended up overbaking them a bit, so check early. 
    5. Let cool completely in the pans before removing the cakes and frosting.

    Monday, November 8, 2010

    Double Apple Bundt Cake

    I was cleaning out my wallet recently and discovered not one, but TWO Williams Sonoma gift cards. I'm never sure if gift cards in my wallet are used up, or still carry a balance, so I checked on these two and sure enough - they both had a balance! There are two things from W-S that I've had in the back of my mind for... quite some time now. One is their Gold Touch cake pans. I have the muffin tin and my cupcakes/muffins always come out flawless, so I've been wanting to slowly replace my current pans, as they age, with Gold Touch pans.

    The other item is the Heritage bundt cake pan. Since I don't have a bundt cake pan, and Tuesdays with Dorie recently made a delectable apple bundt cake that caught my eye, I decided to get the bundt pan to use up my gift cards. Yay! I love new kitchen paraphernalia.

    IMG_0220c

    In a twist of fate, I looked up the recipe in the index in the back of the book, and it had one page number in italics to indicate that there was a photo of the cake. I always love seeing photos, so I flipped to that page and was so excited to see what looked like cranberries! However, then I realized that the cake looked a little... off... from what I was expecting. I'm pretty sure the picture on that page is actually of the Holiday Bundt cake, which calls for cranberries and pumpkin puree. That seemed more like the picture. Nevertheless, I was stuck on cranberries and had already decided they were going in my apple bundt cake. While looking over the Holiday Bundt Cake recipe, I happened to notice a slightly different icing recipe. I decided I like that one better for this cake, so I have included it in the recipe below.

    This cake baked up beautifully in my new Heritage pan! It is dense, moist, and full of apple flavor with the occasional tart bite of cranberry (too occasional for my taste, in the future I might add more!). The maple glaze was a great pairing for these flavors. Overall, a great fall treat!

    Double Apple Bundt Cake
    Source: Dorie Greenspan’s Baking: From My Home to Yours

    * 2 cups AP flour (I used whole wheat pastry flour)
    * 2 teaspoons baking powder
    * ½ teaspoon baking soda
    * ½ teaspoon ground cinnamon
    * ¼ teaspoon freshly grated nutmeg
    * ¼ teaspoon ground ginger
    * ¼ teaspoon salt
    * 1 ¼ sticks (10 tablespoons) unsalted butter, at room temperature
    * 1 ½ cups sugar (I used evaporated cane juice)
    * 1 cup store-bought apple butter
    * 2 eggs
    * 2 medium apples, peeled, cored and grated
    * 1 cup pecans or walnuts, chopped
    * ½ cup plump, moist raisins (dark or golden) (I used 1 cup fresh cranberries
    * Confectioners’ sugar for dusting (optional)

    For the Icing (optional)

    * 6 tablespoons confectioner's sugar
    * About 2 tablespoons pure maple syrup

    Getting ready:  Center a rack in the oven and preheat the oven to 350 degrees F. Butter a 9- to 10- inch (12 cup) Bundt pan. If your pan is not nonstick, dust the interior of the pan with flour, then tap out the excess. (If yo’ve got a silicone Bundt pan, there’s no need to butter or flour it.) Don’t place the pan on a baking sheet – you want the oven’s heat to circulate through the Bundt’s inner tube.

    Whisk together the flour, baking powder, baking soda, spices and salt.

    Working with a stand mixer, preferably fitted with a paddle attachment, or with a hand mixer in a large bowl, beat the butter and sugar on medium speed, scraping the bowl as needed, for 3 minutes, or until the mixture is smooth, thick and pale. Add the eggs one at a time, beating for about 1 minute after each addition; you’ll have a light, fluffy batter. Reduce the mixer speed to low and beat in the apple butter – don’t worry if it curdles the batter. Still on low, add the grated apples and mix to completely blend. Add the dry ingredients, mixing only until they disappear into the batter. Using a rubber spatula, fold in the nuts and raisins/cranberries. Turn the batter into the Bundt pan and smooth the top of the batter with the rubber spatula.

    Bake for 50 to 55 minutes, or until a think knife inserted deep into the center of the cake comes out clean. Transfer the pan to a rack to cool for 5 minutes before unmolding and cooling the cake to room temperature. If possible, once the cake is completely cool, wrap well in plastic and let it stand overnight at room temperature to ripen the flavors.

    If you’re not going to ice the cake, you can dust it with confectioners’ sugar just before serving.

    To make the optional icing:  Put the sugar in a small bowl and stir in maple syrup. Keep adding syrup a little at a time until you have an icing that falls easily from the tip of a spoon. Drizzle the icing over the top of the cake letting it slide down the curves of the cake in whatever pattern it makes. Let the cake stand until the icing dries, a matter of minutes, before slicing.

    Thursday, March 25, 2010

    Strawberry cake with Chocolate Mousse Filling

    A recent baby shower for a friend gave me another chance to bake a cake. I always try to do something different and after some mulling around, I decided on strawberry cake with chocolate mousse filling.

    IMG_0200c2

    I also decided that this cake would be my first leap into fondant. I planned on icing the cake with regular buttercream, but I wanted the decorations to be in fondant. I found a recipe for marshmallow fondant and had a blast working with it! More on that tomorrow.

    IMG_0197c 

    The strawberry cake part didn't turn out quite as I'd planned, as the cake looked more like a whole wheat cake than a strawberry cake! Thankfully, the strawberry flavor came through ever so delicately. The chocolate mousse filling was truly fantastic, and I was definitely excited that I had a little bit left over to save for dessert another night.

    IMG_0204c

    Strawberry Cake with Chocolate Mousse Filling
    Source: Slightly adapted from Good Things Catered, here and here

    For the cake, I modified Angie's Strawberry Cupcake recipe to use pureed strawberries since mine were frozen and I didn't think they would work well, chopped. I also baked it in two 9" round pans rather than in cupcake form. For the mousse, I cut the recipe in half.

    For the cake:
    • 2 1/2 cups cake flour
    • 1 tsp baking soda
    • 1/4 tsp salt
    • 1/2 cup unsalted butter
    • 1 1/2 cup sugar (or a little less)
    • 2 eggs
    • 1/3 cup buttermilk
    • 1/4 cup oil
    • 1 tsp vanilla extract
    • 1 cup pureed strawberries

    Directions:
    Preheat oven to 350 degrees and prepare two 9" or 8" round cake pans by spraying with baking spray.  Sift flour, salt, and baking soda in medium bowl.  In bowl of mixer, cream butter and sugar until fluffy.  Add eggs one at a time until combined.  Add buttermilk, oil and vanilla until combined.  Add flour mixture and stir until just combined.  Stir in pureed strawberries.

    Divide batter between two cake pans.  Bake for approximately 25-30 minutes, or until a toothpick inserted into the center comes out clean.  Cool cake in pans on wire rack for 10 minutes.  Remove cake from pans and continue to cook on wire rack until thoroughly cooled. 

    For the mousse:
    • 4 oz. semisweet chocolate, chopped
    • 1 cups heavy cream, divided
    • 1 Tbsp unsalted butter
    • 1 1/2 egg yolks
    • 1 Tbsp granulated sugar
    • 1 pinch salt
    Directions:
    In large double boiler, add chocolate, 2 tablespoons cream and butter.  Heat over medium heat, stirring occasionally until melted.  Let cool for 10 minutes. Meanwhile, in a medium sauce pan over medium heat, add egg yolks, sugar and 2 tablespoons cream. Whisk to combine over heat, stirring well, until mixture reached 160 degrees, about 2 minutes.  Remove saucepan from heat, add chocolate mixture and set in saucepan in ice.  Stir mixture until cooled, about 7-10 minutes.

    Meanwhile, in bowl of stand mixer, whip remaining 3/4 cup of cream until just forming stiff peaks.  Fold whipped cream into chocolate mixture.  If not filling cake right away, place into bowl, cover with plastic wrap and place into fridge overnight.

    To assemble the cake, place one layer on serving platter, and pipe a border of icing around the edge of the top surface of the cake (to build a well for holding in the mousse).   Generously top bottom layer with chocolate mousse.  Apply top layer of cake, then frost cake as desired. 

    Monday, March 22, 2010

    Pumpkin Chocolate Brownie Cake

    I have been ooo-ing and aaahhh-ing over have cake, will travel for a few weeks now.  The recipe offerings are vegan, but I noticed many of them call for the clean eating ingredients that have become a staple in my kitchen.  I was in the mood to bake this weekend so I perused the dessert offerings over there and decided on this brownie cake.  I've been getting a little tired of cookies, and I wanted to open a can of pumpkin for some baked oatmeal, anyway.   It smelled delicious coming out of the oven, and the 30 minutes of cooling was pure torture.

    IMG_0278c

    One bite of this heavenly, soft, delicious cake and I was seriously concerned about how to prevent myself from eating the rest of the pan before bedtime.  The pumpkin flavor is very light, the cinnamon is warm and inviting, and the chocolate chips add just enough to keep it chocolatey.  I'm in love!

    Pumpkin Chocolate Brownie Cake
    Source: slightly adapted from have cake, will travel
    Yield: 6 to 8 servings  
    • Non-stick cooking spray
    • 1/4 cup skim milk
    • 1 teaspoon apple cider vinegar
    • 1 cup (120 g) whole-wheat pastry flour
    • 1 teaspoon baking powder
    • 1/2 teaspoon baking soda
    • 2/3 cup (128 g) Sucanat
    • 2 tablespoons (10 g) unsweetened cocoa powder
    • 1 teaspoon ground cinnamon
    • 1/2 teaspoon ground ginger
    • 1/2 teaspoon grated nutmeg
    • 1/2 teaspoon fine sea salt
    • 1/2 cup (122 g) pumpkin purée
    • 1/3 cup unsweetened applesauce
    • 2 tablespoons canola oil
    • 2 teaspoons pure vanilla extract
    • 1/3 cup (58 g) bittersweet or semisweet chocolate chips

    Preheat oven to 350°F (180°C, or gas mark 4). Lightly coat an 8-inch (20-cm) square baking pan with spray. Combine vinegar and soymilk in a medium bowl: it will curdle and become like buttermilk.

    In a large bowl, sift together flour, baking powder, baking soda, sucanat, cocoa, spices, and salt.

    Whisk pumpkin purée, applesauce, oil, and vanilla into the buttermilk mixture, until combined.  Fold wet ingredients into dry, being careful not to over mix. Fold in chocolate chips and place batter into prepared pan.


    Bake for 23 minutes, or until a toothpick inserted in the center comes out clean. Let cool in pan, on a wire rack. Remove from pan after at least 30 minutes. Enjoy at room temperature or cold.

    Nutritional Information, per serving (1/6th of recipe)
    Calories: 263
    Total fat: 7 g
    Sat fat: 0.3 g
    Cholesterol: 1.3 mg
    Sodium: 419.6 mg
    Potassium: 28 g
    Carbohydrate: 46.9 g
    Fiber: 4.6 g
    Sugar: 28.3 g
    Protein: 3.4 g

    Friday, February 12, 2010

    Chocolate Peppermint Torte

    IMG_0025c

    I love to get the Penzeys catalog in the mail and flip through it. They fill the catalog with tons of information about their many wonderful spices and blends. But in addition, they add recipes from customers. There are usually great stories to go along with the people and recipes, and it's always fun to read.

    I saw this recipe for Chocolate Peppermint Torte in a recent winter catalog, and couldn't wait to make it! The original recipe called for mini marshmallows in the filling, but I had marshmallow creme that I wanted to use up, and it worked out so well! This cake was a hit and perfect for around the holidays, but then again, it's hard to go wrong with chocolate cake and whipped cream frosting!

    IMG_0026c

    Chocolate Peppermint Torte
    Source: Adapted from Jean Albers/ Penzeys Catalog
    Servings: 16

    For the cake:
    1 1/2 cups flour
    1 1/2 cups sugar
    1 3/4 teaspoons baking soda
    1 teaspoon salt
    1/2 cup cocoa powder
    1/2 cup shortening
    1 cup milk
    1 teaspoon vanilla extract
    2 eggs

    For the filling and frosting:
    1 1/2 pints heavy cream
    2 teaspoons vanilla extract
    1 cup marshmallow fluff/creme
    1 cup crushed peppermint candy
    3/4 cup chopped pecans

    Preheat over to 350 degrees F.
    To make the cake:
    Grease three 9-inch round cake pans and set aside (baking spray works well).  In a large mixing bowl, sift together flour, sugar, baking soda, salt and cocoa.  Add the shortening, milk, and vanilla.  Beat for 2 minutes.  Add the eggs and beat for 2 minutes more.  Divide the batter among the cake pans.  Bake in preheated oven for 15 minutes.  Cool for 10 minutes on a cooling rack.  Carefully remove from pans and allow to cool completely.

    To make the filling/frosting:
    In a chilled mixing bowl, whip the heavy cream until stiff.  Add the vanilla and marshmallow fluff, beat until incorporated.  Fold in the crushed candy and pecans.   Assemble the cake with the filling between each later, and on the top and sides.  Top with additional crushed candy, if desired.

    Nutritional Information, per serving:

    Calories - 440
    Total fat - 28 g
    Cholesterol - 80 mg
    Sodium - 260 mg
    Carbohydrates - 47 g
    Fiber - 2 g

    Monday, October 26, 2009

    Think Pink Cheesecake

    I am blessed to have two very special women in my life - two very special breast cancer surviving women - my grandmother and a very close friend.  For that reason, October has always been a very special month, as it is Breast Cancer Awareness month.  Last year, I sent them some fabulous Kick Cancer's Bum cookies, which I had a blast making and (I hope) they had a blast eating!
    IMG_0007c


    This year I wanted to participate in Jen's The Power of Pink ChallengeKatie had yet another great idea of making mini cheesecakes with a ribbon swirl made of berry puree.  I originally found a recipe for mini cheesecakes (which helped me with timing and temperature), but later realized that I should probably consult my copy of Baking Illustrated, which as been collecting dust on my bookshelf.  I made some adjustments to the first recipe based on the information in Baking Illustrated. The resulting cheesecake is light, with an almost whipped texture, and absolutely delicious.  The hint of strawberry from the incorporated puree is wonderful.


     IMG_0021c

    Think Pink Cheesecake
    Adapted from: Fresh from the Oven / Junior's Cheesecake Cookbook: 50 To-Die-For Recipes for New York-Style Cheesecake (Juniors) / Baking Illustrated

    Yield: 13 mini cheesecakes

    For the crust:
    • 1 cup graham cracker crumbs
    • 4 tablespoons butter, melted
    • 3 tablespoon sugar
    For the cheesecake:
    • 6 ounces fresh or frozen strawberries
    • two 8-ounce packages Philadelphia Cream Cheese (use either full fat or 1/3 less fat Neufchtel), at room temperature
    • 2/3 cup plus 1 teaspoon sugar, divided
    • 1 tablespoon pure vanilla extract
    • 2 extra large eggs plus 1 egg yolk
    • 1/2 cup sour cream
    • 1 teaspoon lemon juice
    1. Place the strawberries and 1 teaspoon sugar in a bowl and allow berries to macerate for 1-2 hours, then add to a small food processor or blender and process until smooth.  Strain puree to remove seeds.
    2. Preheat over to 350 degrees F.  Line 13 standard muffin cups with silicone, foil, parchment, or paper liners.(You can use Reynold's disposable aluminum foil cups if you don't have 2 pans). 
    3. Prepare crust by combining graham cracker crumbs, melted butter and sugar in a bowl and stirring to combine.  Press 2 teaspoons of crust mixture into the bottom of each lined muffin cup.  Bake 6 minutes.
    4. Meanwhile, prepare filling. Put one package of cream cheese and 1/3 cup of sugar in a large bowl. Beat with an electric mixer on low until creamy, about 3 minutes, scraping down the bowl a few times. Blend in the remaining cream cheese and 1/3 cup sugar, then the vanilla. Blend in the eggs and yolk, one at a time, beating well after adding each one. Beat in the sour cream just until it's completely blended.
    5. Add 1/4 cup of strawberry puree to a small bowl.  Add 1/4 cup of cheesecake batter and stir thoroughly, then add the puree blend to a ziplock bag.
    6. Add remaining strawberry puree (about 1/4 cup) to the cheesecake batter and stir thoroughly to blend.
    7. Divide the batter among the 13 muffin cups (fill each one almost up to the top). Cut a very small tip off the corner of the plastic bag containing the puree, and gently pipe ribbon shape with puree in the top of each mini cheesecake.
    8. Place the muffin tin in a large shallow pan and add hot water until it comes about 1 inch up the sides of the tin. Bake the cakes until set and slightly puffy, about 30 minutes.  Remove the cakes from the water bath, transfer the tin to a wire rack, and let cool for 2 hours.*Transfer the cake to a container and chill for at least 4 hours before serving.  If there are any cakes left, cover with plastic wrap and store in the refrigerator or wrap and freeze for up to 1 month.

    Thursday, September 24, 2009

    BB: Beatty's Chocolate Cake


    This week for Barefoot Bloggers we had the second of two cakes. I made this earlier in the month for a party to honor a friend who is getting married. Since she loves chocolate and this cake was on my To Do list for the month, I thought it would be a great fit for this special occasion.


    As I started making the cake, I was pleased to see it was one of the easy recipes... combine dry ingredients in one bowl, wet in the other, them mix together. To me, nothing is worse than having to add each ingredient one at a time to a whirring stand mixer. I love easy. At the end, as I added the coffee, I realize that this was quite similar to my favorite chocolate cake recipe, Hershey's Perfectly Chocolate Cake (which I used here for S'mores Cupcakes). A quick look at the two recipes shows that they are nearly identical! Slight variations in baking soda, baking powder, vanilla extract and the use of hot coffee or hot water are all that separate these two recipes.

    I made 1.5 times the original recipe because I have 9 inch cake pans and hate having flat cakes. I divided the batter between those two pans, but it proved to be too much batter as the cake rise quite a bit. Mine collapsed a little in the center, so I should have reserved some of that batter for cupcakes.

    Ultimately, I loved the lift that these cakes had, but love the ease of using regular milk and water in the Hershey's recipe. I'll probably tweak the two recipes together the next time I need chocolate cake. Both recipes make truly fantastic, moist, rich, chocolatey cake. The frosting was very easy to work with, spread smoothly (even with my poor decorating skills) and was a good amount of chocolate and sweet.

    I topped the cake with lazy chocolate covered strawberries and white chocolate shavings. Everyone loved it!


    Beatty’s Chocolate Cake
    Source: Barefoot Contessa at Home on pages 165-166
    Chosen by Mary of Passionate Perseverance

    • Butter, for greasing the pans
    • 1 3/4 cups all-purpose flour, plus more for pans
    • 2 cups sugar
    • 3/4 cups good cocoa powder
    • 2 teaspoons baking soda
    • 1 teaspoon baking powder
    • 1 teaspoon kosher salt
    • 1 cup buttermilk, shaken
    • 1/2 cup vegetable oil
    • 2 extra-large eggs, at room temperature
    • 1 teaspoon pure vanilla extract
    • 1 cup freshly brewed hot coffee

    Directions

    Preheat the oven to 350 degrees F. Butter 2 (8-inch) round cake pans. Line with parchment paper, then butter and flour the pans.

    Sift the flour, sugar, cocoa, baking soda, baking powder, and salt into the bowl of an electric mixer fitted with a paddle attachment and mix on low speed until combined. In another bowl, combine the buttermilk, oil, eggs, and vanilla. With the mixer on low speed, slowly add the wet ingredients to the dry. With mixer still on low, add the coffee and stir just to combine, scraping the bottom of the bowl with a rubber spatula. Pour the batter into the prepared pans and bake for 35 to 40 minutes, until a cake tester comes out clean. Cool in the pans for 30 minutes, then turn them out onto a cooling rack and cool completely.

    Place 1 layer, flat side up, on a flat plate or cake pedestal. With a knife or offset spatula, spread the top with frosting. Place the second layer on top, rounded side up, and spread the frosting evenly on the top and sides of the cake.


    Chocolate Frosting:

    • 6 ounces good semisweet chocolate (recommended: Callebaut)
    • 1/2 pound (2 sticks) unsalted butter, at room temperature
    • 1 extra-large egg yolk, at room temperature
    • 1 teaspoon pure vanilla extract
    • 1 1/4 cups sifted confectioners' sugar
    • 1 tablespoon instant coffee powder

    Chop the chocolate and place it in a heat-proof bowl set over a pan of simmering water. Stir until just melted and set aside until cooled to room temperature.

    In the bowl of an electric mixer fitted with a paddle attachment, beat the butter on medium-high speed until light yellow and fluffy, about 3 minutes. Add the egg yolk and vanilla and continue beating for 3 minutes. Turn the mixer to low, gradually add the confectioners' sugar, then beat at medium speed, scraping down the bowl as necessary, until smooth and creamy. Dissolve the coffee powder in 2 teaspoons of the hottest tap water. On low speed, add the chocolate and coffee to the butter mixture and mix until blended. Don't whip! Spread immediately on the cooled cake.

    Monday, May 25, 2009

    Organic Lemon Cake with Raspberry Filling

    I had a party to attend and offered to make a cake. I wanted something light and summery, and I thought this cake would go well with the requested pink frosting. The cake had a light lemon flavor to it, and the filling was absolutely delicious! The raspberry flavor was not muted, and played so well with the lemon. It got rave reviews at the party! See the buttercream I used, here.


    Organic Lemon Cake with Raspberry Filling
    Source: Good Things Catered

    For the cake:
    2 1/2 c. cake flour
    1 3/4 c. granulated sugar
    1 Tbsp meringue powder
    3 tsp baking powder
    1/4 tsp salt
    1 extra large organic lemon, washed thoroughly then zested and juiced separately
    1 c. milk
    1/3 c. vegetable oil
    3 egg whites, beaten
    1/4 tsp vanilla extract
    three drops of almond extract

    For the filling:
    2 c. powdered sugar
    minuscule pinch of salt
    1/2 c. shortening
    1 1/2 tsp natural raspberry extract
    1/2 tsp butter flavor
    4 oz. fresh raspberries

    Directions:
    -Preheat oven to 350 degrees and prepare two cake pans.
    -In bowl of electric mixer sift and add flour, sugar, baking powder, meringue powder, salt, and zest of full lemon.
    -Stir with mixer to combine, about 30 seconds.
    -Add milk, oil, juice from lemon, beaten egg whites and extracts.
    -Beat on medium to combine thoroughly, about 1 1/2 - 2 minutes.
    -Remove from mixer and stir with silicone spatula to thoroughly combine (making sure there is no flour mixture left unincorporated at the bottom of the bowl.
    -Fill prepared pans 2/3 of the way full and bake until toothpick inserted into center comes out clean (about 25-28 mins for 8 inch pans)
    -Remove from oven, let cool 10 minutes in pan and then turn onto wire racks to cool completely.
    -Meanwhile, in the bowl of stand mixer, combine shortening and extracts and stir on low until relatively combined.
    -In a separate bowl, combine sugar and salt, then add to mixer while still on.
    -Stir, scraping down sides of bowl, until thoroughly combined.
    -Add raspberries and stir to combine.
    (Add water if needed to reach desired texture.)
    -Once cakes are completely cool, cut uneven tops off cake.
    -Form an icing dam around the edge of the top of one of the layers.
    -Fill with raspberry filling and flip the top of the other layer onto the top of the filled cake.
    -Ice as desired.

    Sunday, November 9, 2008

    Pumpkin Praline Cheesecake

    With all the experimental baking I've done, I've never made cheesecake before. This is probably due, in part, to the fact that I don't like cheesecake. However, my husband DOES love cheesecake and when he came home with 3 giant cans of pumpkin pie mix instead of pure pumpkin puree, I checked out www.verybestbaking.com to see what I could use it for and decided on pumpkin cheesecake. I was really nervous about making the cheesecake because I always hear about how it didn't go well... cracked top, shrinking, etc. I read up on how to bake using a water bath (thanks Allrecipes!), and learned a few other tricks for mixing the batter properly. (Oh no! It says no over-mixing!!! This is by far my baking Achilles Heel.)


    I was very pleasantly surprised to see that everything went REALLY well. No cracking (though if it did, I had that lovely topping to conceal it!), or any other funny business. I may be underbaked it a tiny bit. I didn't really let it chill the recommended amount of time before slicing, so that may have something to do with it, too. I modified the baking instructions based on what I read on allrecipes (listed in italics in the instructions). As I said, I'm not a cheesecake fan, so my husband was the only litmus test. I had planned on saving him two pieces, then bringing the rest to work. He refused to let me take it... so I'm thinking that means it was pretty darn good! Time to make room in the freezer!
    Pumpkin Praline Cheesecake

    For the crust:
    1/2 cups graham cracker crumbs
    1/4 cup granulated sugar
    1/3 cup melted butter

    For the pralines:
    1/2 cups chopped pecans
    1/2 cup packed brown sugar
    2 tablespoons water

    For the cheesecake:
    1 pkg. (8 oz.) cream cheese, softened
    1/2 cup packed brown sugar
    1/2 cup cornstarch
    1 teaspoon ground cinnamon
    2 large eggs
    1 can (30 oz.) Libby's Pumpkin Pie Mix

    Directions:
    Preheat oven to 350° F.
    For the crust:
    Combine graham cracker crumbs and granulated sugar in large bowl. Stir in butter. Press onto bottom and 1 inch up side of 9-inch springform pan.

    For pralines:
    Combine nuts, brown sugar and water in same bowl. Reserve 3/4 cup praline mixture for topping. Sprinkle remaining praline mixture over crumbs in pan. Bake for 8 minutes or until lightly browned. Cool on wire rack for 10 minutes.

    For cheesecake:
    Beat cream cheese in large bowl. Beat in brown sugar, cornstarch and cinnamon. Beat in eggs. Beat in pumpkin pie mix. Spoon over baked crust/nuts. Cover bottom of springform pan with foil to create a leakproof barrier for the water bath. Place springform pan into another, larger pan and place in the oven. Add boiling water to the larger pan to create the water bath. Bake for 50 to 60 minutes or until edge is set but 2-3 inches of the center still moves slightly. Sprinkle with reserved praline mixture. Bake for an additional 10 to 15 minutes or until the very center moves slighty. Turn off the oven and leave the cheesecake in, with door closed, for one hour. Run knife around edge of cheesecake. Cool in pan on wire rack. Refrigerate for several hours or overnight. Remove side of springform pan, slice and serve.

    Tuesday, April 22, 2008

    TWD: Bill's Big Carrot Cake


    I love carrot cake. LOVE it. I remember my mom used to make it for my birthday (unless I requested ice cream cake). She must have make it from a box all those years, because finally, one year she made it from scratch and OH did I hear about it! She would NEVER grate that many carrots AGAIN.

    I decided I wasn't up for grating carrots either, so I chopped them up a bit and threw them in this reeeaaaally mini food processor attachment that came with my immersion blender. I had 'grated' carrot in seconds.

    I debated leaving out the raisins in this, because I don't really think they have a place in carrot cake, but ultimately I decided that I should give the whole recipe a chance, at least once! I used golden raisins (that I still had leftover from the apple-pie cake) so my cake didn't have random dark specs in it. Also, frosting it didn't go quite as planned. Dorie's fabulous photo shows a bare-sided cake, with a thick, luscious heap of frosting between each layer of cake. I was afraid of not having enough frosting (and apparently too lazy to measure) so when the second layer was plopped down, I realized I'd skimped to much. By the time I was done, I had enough left to frost the sides, so I did, but it wasn't quite thick enough.. blah blah blah, I stuck some coconut on there and called it a day.

    Overall, this is one FABULOUS carrot cake - incredibly moist and SO tasty. Next time I probably will omit those raisins, and maybe give the pecans a try. I used walnuts this time and would love to see what pecans bring to the table.

    Oh, and check out my review of Wilton's Bake Even Strips... I used them on these layers and they came out perfect!


    Bill's Big Carrot Cake
    Baking: From My Home to Yours, by Dorie Greenspan
    Chosen by Amanda of slow like honey
    See more TWD bakers here!

    Yields 10 servings

    Ingredients:

    For the cake:
    2 cups all purpose flour
    2 teaspoons baking powder
    2 teaspoons baking soda
    2 teaspoons ground cinnamon
    ¾ teaspoon salt
    3 cups grated carrots (about 9 carrots, you can grate them in food processor fitted w/ a shredding a blade or use a box grater)
    1 cup coarsely chopped walnuts or pecans
    1 cup shredded coconut (sweetened or unsweetened)
    ½ cup moist, plump raisins (dark or golden) or dried cranberries
    2 cups sugar
    1 cup canola oil
    4 large eggs

    For the frosting:
    8 ounces cream cheese, room temperature
    1 stick ( 8 tablespoons) unsalted butter, at room temperature
    1 pound or 3 and ¾ cups confectioners' sugar, sifted
    1 tablespoon fresh lemon juice or ½ teaspoon pure lemon extract
    ½ cup shredded coconut (optional)
    Finely chopped toasted nuts and/or toasted shredded coconut (optional)

    Getting ready:
    Position the racks to divide the oven into thirds and preheat the oven to 325 degrees Fahrenheit. Butter three 9-x-2-inch round cake pans, flour the insides, and tap out the excess. Put the two pans on one baking sheet and one on another.

    To make the cake:
    Whisk the flour, baking powder, baking soda, cinnamon and salt. In another bowl, stir together the carrots, chopped nuts, coconut, and raisins.
    Working with a stand mixer, preferably fitted with a paddle attachment, or with a hand mixer in a large bowl, beat the sugar and oil together on a medium speed until smooth. Add the eggs one by one and continue to beat until the batter is even smoother. Reduce the speed to low and add the flour mixture, mixing only until the dry ingredients disappear. Gently mix the chunky ingredients. Divide the batter among the baking pans.
    Bake for 40-50 minutes, rotating the pans from top to bottom and front to back at the midway point, until a thin knife inserted into the centers comes out clean. The cakes will have just started to come away from the sides of the pans. Transfer the cakes to cooling racks and cool for about 5 minutes, then run a knife around the sides of the cakes and unmold them. Invert and cool to room temperature right side up.
    The cakes can be wrapped airtight and kept at room temperature overnight or frozen for up to 2 months.

    To make the frosting:
    Working with a stand mixer, preferably fitted with a paddle attachment or with a hand mixer in a large bowl, beat the cream cheese and butter together until smooth and creamy. Gradually add the sugar and continue to beat until the frosting is velvety smooth. Beat in the lemon juice or extract.
    If you'd like coconut in the filling, scoop about half of the frosting and stir the coconut into this position.

    To assemble the cake:
    Put one layer top side up on a cardboard cake round or a cake plate protected by strips of wax or parchment paper. If you added the coconut to the frosting, use half of the coconut frosting to generously cover the first layer (or generously cover with plain frosting). Use an offset spatula or a spoon to smooth the frosting all the way to the edges of the layer. Top with the second layer, this time placing the cake stop side down, and frost with the remainder of the coconut frosting or plain frosting. Top with the last layer, right side up, and frost the top- and the sides- of the cake. Finish the top with swirls of frosting. If you want to top the cake with toasted nuts or coconut, sprinkle them on now while the frosting is soft.
    Refrigerate the cake for 30 minutes, just to set the frosting before serving.

    Serving:
    This cake can be served as soon as the frosting is set. It can also wait, at room temperature and covered with a cake keeper overnight. The cake is best served in thick slices at room temperature and while it's good plain, it's even better with vanilla ice cream or some lemon curd.

    Storing:
    The cake will keep at room temperature for 2 to 3 days. It can also be frozen. Freeze it uncovered, then when it's firm, wrap airtight and freeze for up to 2 months. Defrost, still wrapped, overnight in the refrigerator.

    Tuesday, April 1, 2008

    TWD: Gooey Chocolate Cakes


    Another week gone by, another Tuesday arrives. This week's Dorie recipe was Gooey Chocolate Cakes. I'm not big on chocolate, but it looked easy enough and hubby's eyes lit up when I said I'd make some for him with butterscotch chips in the middle. I have 7 ounce ramekins, and filled 3 with this recipe. 13 minutes didn't seem like enough, so I went 2 minutes longer. I know this narration is really boring, but (finally) nothing seemed to go wrong! (Unless you count dropping my top-heavy whisk and getting chocolate all over myself - fun times!)

    GAH!! I spoke too soon. I just unmolded my lovely chocolate cakes. If you want runny molten lava -you came to the right place! I'm thinking my walls are a little TOO thin... however, nothing a lil' ice cream (really, check this stuff out!) can't fix! This seriously tastes like an ice cream sundae - heavy on the hot fudge sauce.


    Gooey Chocolate Cakes
    Baking: From My Home to Yours, by Dorie Greenspan
    Chosen by Leigh of Lemon Tartlet
    See more TWD bakers here!

    1/3 cup all-purpose flour
    3 tablespoons unsweetened cocoa powder
    ¼ teaspoon salt
    5 ounces bittersweet chocolate, (4 ounces coarsely chopped, 1 ounce very finely chopped)
    1 stick (8 tablespoons) unsalted butter, cut into 8 pieces
    2 large eggs, at room temperature
    1 large egg yolk, at room temperature
    6 tablespoons of sugar

    Getting ready:
    Center a rack in the oven and preheat the oven to 400 degrees F. butter (or spray – it’s easier) 6 cups of a regular-size muffin pan, preferably a disposable aluminum foil pan, dust the insides with flour and tap out the excess. Put the muffin pan on a baking sheet.

    Sift the flour, cocoa and salt together.

    Set a heatproof bowl over a saucepan of gently simmering water, put the coarsely chopped chocolate and the butter in the bowl and stir occasionally over the simmering water just until they are melted – you don’t want them to get so hot that the butter separates. Remove the bowl from the pan of water.

    In a large bowl, whisk the eggs and yolk until homogenous. Add the sugar and whisk until well blended, about 2 minutes. Add the dry ingredients and, still using the whisk, stir (don’t beat) them into the eggs. Little by little, and using a light hand, stir in the melted chocolate and butter. Divide the batter evenly among the muffin cups and sprinkle the finely chopped chocolate over the batter.

    Bake the cakes for 13 minutes. Transfer them, still on the baking sheet, to a rack to cool for 3 minutes. (There is no way to test that these cakes are properly baked, because the inside remains liquid.)

    Line a cutting board with a silicone baking mat or parchment or wax paper, and, after the 3-minute rest, unmold the cakes onto the board. Use a wide metal spatula to lift the cakes onto dessert plates.

    Monday, February 18, 2008

    TWD: Almost Fudge Gateau

    I am SO excited to now be a part of Tuesdays with Dorie (go here for more!). I received Dorie Greenspan's Baking: From My Home to Yours for Christmas and have been dying to dig in. For this week, Nikki of Crazy Delicious chose the Almost Fudge Gateau. I had a few technical problems along the way (ok, one big one... over beating the egg whites), but in the end it was still edible so I don't think I did too badly. Also, reading over the directions here I realize that I never dusted my pan with flour. Again, it didn't seem any worse for wear and unmolded perfectly from my springform pan.

    Almost-Fudge Gâteau
    5 large eggs
    9 ounces bittersweet chocolate, coarsely chopped
    1 cup of sugar
    5 tablespoons unsalted butter, cut into chunks
    2 tablespoons coffee or water (I used water as no one in my house drinks coffee so I didn't have any)
    1/3 cup all-purpose flour
    Pinch of salt

    For the Glaze (optional)
    4 ounces bittersweet chocolate, coarsely chopped
    ½ cup heavy cream
    2 teaspoons light corn syrup

    Getting Ready:
    Center a rack in the oven and preheat the oven to 350 degrees F. Butter a 9-inch springform pan, line the bottom with parchment paper, butter the paper, dust the inside of the pan with flour and tap out the excess. Place the pan on a baking sheet lined with parchment or a silicone mat.

    Separate the eggs, putting the whites in a mixer bowl or other large bowl and the yolks in a small bowl.

    Set a heatproof bowl over a saucepan of simmering water and add the chocolate, sugar butter and coffee. Stir occasionally until the chocolate and butter are melted; the sugar may still be grainy, and that's fine. Transfer the bowl to the counter and let the mixture sit for 3 minutes.
    Using a rubber spatula, stir in the yolks one by one, then fold in the flour.

    Lookin' good so far!


    Working with the whisk attachment of the mixer or a hand mixer, beat the egg whites with the pinch of salt until they hold firm, but glossy peaks. Using the spatula, stir about one quarter of the beaten whites into the batter, then gently fold in the rest. Scrape the butter into the pan and jiggle the pan from side to side a couple of times to even the batter.


    Here I am... about to over beat the egg whites...


    Bake for 35 to 45 minutes, or until the cake has risen evenly (it might rise around the edges and you'll think it's done, but give it a few minutes more, and the center will puff too) and the top has firmed (it will probably be cracked) and doesn't shimmy when tapped; a thin knife inserted into the center should come out just slightly streaked with chocolate. Transfer the pan to a cooling rack and let the cake rest for 5 to 10 minutes.

    Run a blunt knife gently around the edges of the cake and remove the sides of the pan. Carefully turn the cake over onto a rack and remove the pan bottom and the parchment paper. Invert the cake onto another rack and cool to room temperature right side up. As the cake cools, it may sink.


    Cooling, and not terribly impressive...


    To Make the Optional Glaze:
    First, turn the cooled cake over onto another rack so you'll be glazing the flat bottom, and place the rack over a baking sheet lined with parchment or wax paper to catch any drips.
    Put the chocolate in a small heatproof bowl.


    Melt the chocolate over a pan of simmering water or in a microwave oven – the chocolate should be just melted and only warm, not hot. Meanwhile, bring the cream to a boil in a small sauce pan. Pour the hot cream over the chocolate and stir very gently with a rubber spatula until the mixture is smooth and shiny. Stir in the corn syrup.


    Pour the glaze over the cake and smooth the top with a long metal icing spatula. Don't worry if the glaze drips unevenly down the sides of the cake – it will just add to its charms. Allow the glaze to set at room temperature or, if you're impatient, slip the cake into the refrigerator for about 20 minutes. If the glaze dulls in the fridge, just give it a little gentle heat from a hairdryer.


    I made one mini gateau in a ramekin so I could taste test before bringing this delight to work. I probably would not have done this if it weren't for the over beating part... I was nervous! Clearly, there was no problem with the final product. :-)