I've moved! Follow me over to The Balanced Baker.


Sunday, March 16, 2008

Spinach Soup


In the never ending search for new meal options on Fridays during Lent, I was happy to be rummaging through my pantry and stumble upon a box of pearl pasta. This box happened to have a healthy, delicious sounding recipe for spinach soup on the side... so I gave it a shot. I changed it up a tad, and certainly added some more seasoning as I initially found it to be quite bland. My husband loved it, too, so I just made a big batch and will be freezing it for an easy to grab lunch.


Spinach Soup
Adapted from a box of Ronzoni Acini Pepe pasta

1/2 cup chopped onion
3 cloves garlic, minced
1.5 Tbsp butter
70 ounces vegetable broth (5- 14oz cans)
3 plum tomatoes, diced
3/4 cup acini pepe pasta
1/4 tsp nutmeg
5 ounces fresh spinach
1 tsp chili powder
1 tsp celery salt
1/2 tsp crushed red pepper
salt and pepper, to taste
grated parmesan cheese for topping (optional)

~Heat butter in stockpot, add onion and garlic and cook until tender, not brown.
~Add broth, tomatoes bring to a boil.
~Add acini pepe and nutmeg, simmer 5 minutes.
~Add spinach and remaining spices, simmer 5 minutes more, until spinach is wilted down.
~Sprinkle with fresh grated parmesan cheese before serving, if desired.

After pouring a bowl for myself, I got 6 servings of nearly 2 cups into containers for the freezer, so I'd say this makes about 7 servings.


Tuesday, March 11, 2008

TWD: Russian Grandmother's Apple Pie-Cake


I almost felt as though I could not participate this week. See, my grandmother (or "Grammy") is famous (ok, legendary) in our family for her apple pie (which I actually just made 2 weeks ago and must remember to photograph so I can share it here). She can't go anywhere without bringing one, and we all fight over it. It just didn't see right making an apple pie (ok, pie-cake) from any other grandmother.

But, I joined Tuesdays with Dorie to test out Baking: From My Home to Yours cover to cover, so I embarked upon the pie-cake adventure. I knew in my heart of hearts that I should have applied Grammy's tips and tricks to this recipe, but my sense of “I must follow directions!” got the better of me.

All in all, it was yummy, but I was in a rush and didn’t test the apples for the right amount of sugar, as Dorie suggests. It could have used some more. Of course, it doesn’t hold a candle to Grammy’s apple pie. :-)

Russian Grandmothers' Apple Pie-Cake
Chosen by Natalie of Burned Bits

For The Dough
2 sticks (8 ounces) unsalted butter, at room temperature
1 cup sugar
2 large eggs
1 tablespoon baking powder
1/2 teaspoon salt
Juice of 1 lemon
3 1/4 - 3 1/2 cups all-purpose flour

For The Apples
10 medium apples, all one kind or a mix (I like to use Fuji, Golden Delicious and Ida Reds; my grandmother probably used dry baking apples like Cordland and Rome)
Squirt of fresh lemon juice
1 cup moist, plump raisins (dark or golden)
1/4 cup sugar
1 1/4 teaspoons ground cinnamon

Sugar, preferably decorating (coarse) sugar, for dusting

To Make The Dough: Working with a stand mixer, preferably fitted with a paddle attachment, or with a hand mixer in a large bowl, beat the butter and sugar together on medium speed until smooth, about 2 minutes. Add the eggs and continue to beat until the mixture is light and fluffy, about 3 minutes more. Reduce the mixer speed to low, add the baking powder and salt and mix just to combine. Add the lemon juice - the dough will probably curdle, but don't worry about it. Still working on low speed, slowly but steadily add 3 1/4 cups of the flour, mixing to incorporate it and scraping down the bowl as needed. The dough is meant to be soft, but if you think it looks more like a batter than a dough at this point, add the extra 1/4 cup flour. (The dough usually needs the extra flour.) When properly combined, the dough should almost clean the sides of the bowl.


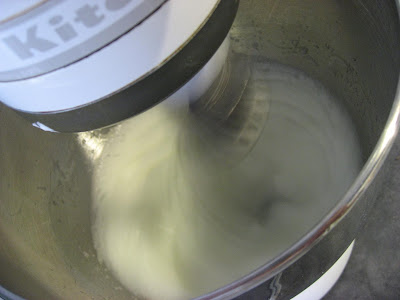
I don't know why this fascinates me so...


Turn the dough out onto a work surface, gather it into a ball and divide it in half. Shape each half into a rectangle. Wrap the dough in plastic wrap and refrigerate for at least 2 hours, or for up to 3 days. (The dough can be wrapped airtight and frozen for up to 2 months; defrost overnight in the refrigerator.)

To Make The Apples: Peel and core the apples and cut into slices about 1/4 inch thick; cut the slices in half crosswise if you want. Toss the slices in a bowl with a little lemon juice - even with the juice, the apples may turn brown, but that's fine - and add the raisins. Mix the sugar and cinnamon together, sprinkle over the apples and stir to coat evenly. Taste an apple and add more sugar, cinnamon, and/or lemon juice if you like.

Getting Ready to Bake: Center a rack in the oven and preheat the oven to 375 degrees F. Generously butter a 9x12-inch baking pan (Pyrex is good) and place it on a baking shee tlined with parchment or a silicone mat.

Remove the dough from the fridge. If it is too hard to roll and it cracks, either let it sit at room temperature for about 15 minutes or give it a few bashes with your rolling pin to get it moving. Once it's a little more malleable, you've got a few choices. You can roll it on a well-floured work surface or roll it between sheets of plastic wrap or wax paper. You can even press or roll out pieces of the dough and patch them together in the pan - because of the baking powder in the dough, it will puff and self-heal under the oven's heat. Roll the dough out until it is just a little larger all around than your pan and about 1/4 inch thick - you don't want the dough to be too thin, because you really want to taste it. Transfer the dough to the pan. If the dough comes up the sides of the pan, that's fine; if it doesn't that's fine too.

Give the apples another toss in the bowl, then turn them into the pan and, using your hands, spread them evenely across the bottom.

Roll out the second piece of dough and position it over the apples. Cut the dough so you've got a 1/4 to 1/2 inch overhang and tuck the excess into the sides of the pan, as though you were making a bed. (If you don't have that much overhang, just press what you've got against the sides of the pan.)

Brush the top of the dough lightly with water and sprinkle sugar over the dough. Using a small sharp knife, cut 6 to 8 evenly spaced slits in the dough.

Bake for 65 to 80 minutes, or until the dough is a nice golden brown and the juices from the apples are bubbling up through the slits. Transfer the baking pan to a cooling rack and cool to just warm or to room temperature. You'll be tempted to taste it sooner, but I think the dough needs a little time to rest.

Monday, March 10, 2008

Champagne Risotto


I've been flexing my baking wings, so to speak, with the Tuesdays with Dorie group and I thought it was time to try cooking something new. I have always been intrigued (ok not always, really just since that aweful-but-addictive Hell's Kitchen) by risotto and the fear that it is difficult to make (quickly followed by the "oh, but it's really sooooo easy!"). Such things never end up being easy for me, but the arborio rice has been sitting in my cabinet for over a week and is too expensive to let waste away!

So, off I went to the Food Network for some inspiration. It didn't take long before I stumbled across Giada's Champagne Risotto. The (now flat) leftover prosecco in my refrigerator had a new purpose! I was VERY excited to make this, and it did NOT disappoint! It came together surprisingly easy, and I am very impressed that I mananged to not screw it up. It was ridiculously good and I can't wait to make risotto again!!

Champagne Risotto

4 thin slices prosciutto (omitted)
3 cups reduced-sodium chicken broth
12 asparagus spears, cut diagonally into 1-inch pieces (replaced with about 1/2 cup frozen peas)
2 tablespoons butter,divided
1 shallot, finely chopped
3/4 cup Arborio rice or medium-grain white rice
3/4 cup Champagne
1/4 cup freshly grated Parmesan
1/4 teaspoon salt
1/2 teaspoon freshly ground black pepper

Preheat the oven to 450 degrees F.

Place the slices of prosciutto on a lightly greased baking sheet. Bake until the prosciutto slices are almost completely crisp, about 6 to 8 minutes. The slices will crisp up even more as they cool. Reserve for garnish.

In a medium saucepan, bring the chicken stock to a boil. Reduce heat to a simmer. Blanch the asparagus in the chicken stock for 2 minutes. Remove the asparagus with a slotted spoon. Set the asparagus aside and keep the chicken stock at a low simmer.

In another medium saucepan, melt 1 tablespoon of the butter. Add the shallot and cook until tender, about 3 minutes. Add the Arborio rice and stir to coat in the butter. Continue toasting the rice, stirring constantly, for about 3 minutes more. Add the Champagne and simmer until the liquid has almost evaporated, about 3 minutes. Add 1/2 cup of the simmering broth and stir until almost completely absorbed, about 2 minutes. Continue cooking the rice, adding the broth 1/2 cup at a time, stirring constantly and allowing each addition of broth to absorb before adding the next, until the rice is tender but still firm to the bite and the mixture is creamy, about 20 minutes total. Remove from the heat. Gently stir in the asparagus, remaining butter, Parmesan, salt, and pepper. Spoon the risotto into serving dishes and garnish by breaking the crisp prosciutto into smaller pieces over the top of the risotto. Serve immediately.

Just look at that creamy goodness... :-)

Tuesday, March 4, 2008

TWD: Snickery Squares


Another Tuesday, another recipe from Dorie Greenspan's Baking: From My Home to Yours. For this week, Erin of Dinner and Dessert chose Snickery Squares, which are roughly a homemade version of snickers.

I was once again concerned about my abilities and having the recipe come out right. For the base, it says to use a food processor for blending the ingredients together. I don't have one, but I do have a mini processor-like attachment for our blender. I had to make the base in two batches so it would fit in the mini processor. I was feelin' good with my new found skills from everyone's biscuit experience. I grated my cold butter like a pro. But I was unsure about the base as I was patting it in to the pan... pricking it with a fork didn't leave nice marks as I expected, but rather, simply dislodged the mixture at that spot. I left it in the oven a little longer than stated after realizing my oven was at about 320 instead of 350.

(History: I have a VERY off-base oven. I bought an oven thermometor on a whim to see how my oven was doing. It was way off! I bought a second oven thermometor to check the first (how do I know if it's right, anyway?) and that gave me yet a THIRD reading. My oven (when the two thermometers get close enough for a "consensus" reading) basically runs about 50 degrees hotter than the dial says. But there is a slightly exponential increase as you go higher. So for a 350 degree oven, I set the dial to a hair past 300. For 400, I set to 340. For 450? 375. Turns out I was a little shy of 300 on the dial so the oven temp wasn't quite making it to 350. But I digress...)

Caramelizing the peanuts (another first!) went surprisingly well, and Dorie's description of the process guided me right through. I have no idea, however, how she fit 1 1/2 cups of nuts in this 8x8 pan. I put a little more than half in the filling layer, then generously coated the top chocolate layer. I had at least 1/3 cup leftover! Clearly there is also some magic to cutting these. My chocolate layer was cracking all over the place.

Sadly, I did not care very much for these. I don't know if it is my "eh" feelings on chocolate, or I over roasted the peanuts, or what. They just didn't do anything for me. A few chocoholic friends thought they were great, though!

Snickery Squares

For the Crust:
1 cup all-purpose flour
¼ cup sugar
2 TBSP powdered sugar
¼ tsp salt
1 stick unsalted butter, cut into small pieces and chilled
1 large egg yolk, lightly beaten

For the Filling:
½ cup sugar
3 TBSP water
1 ½ cups salted peanuts
About 1 ½ cups store-bought dulce de leche

For the Topping:
7 ounces bittersweet, coarsely chopped (I used semisweet)
½ stick unsalted butter, cut into 8 pieces, at room temperature

Getting Ready:
Preheat oven to 350F. Butter a 8 inch square pan and put it on a baking sheet.

To Make the Crust:
Toss the flour, sugar, powdered sugar and salt into a food processor and pulse a few times to combine. Toss in the pieces of cold butter and pulse about 12 times, until the mixture looks like coarse meal. Pour the yolk over the ingredients and pulse until the dough forms clumps and curds-stop before the dough comes together in a ball.

Turn the dough into the buttered pan and gently press it evenly across the bottom of the pan. Prick the dough with a fork and slide the sheet into the oven.

Bake the crust for 15-20 minutes, or until it takes on just a little color around the edges. Transfer the pan to a rack and cool to room temperature before filling.

To Make the Filling:
Have a parchment or silicone mat-lined baking sheet at the ready, as well as a long-handled wooden spoon and a medium heavy bottomed saucepan.

Put the sugar and water in the saucepan and cook over medium-high heat, stirring, until the sugar dissolves. Keeping the heat fairly high, continue to cook the sugar, without stirring, until it just starts to color. Toss the peanuts and immediately start stirring. Keep stirring, to coat the peanuts with sugar. Within a few minutes, they will be covered with sugar and turn white—keep stirring until the sugar turns back into caramel. When the peanuts are coated with a nice deep amber caramel, remove the pan from the heat and turn the nuts out onto the baking sheet., using the wooden spoon to spread them out as best you can.

Cool the nuts to room temperature. When they are cool enough to handle, separate the nuts or break them into small pieces. Divide the nuts in half. Keep half of the nuts whole or in biggish pieces for the filling, and finely chop the other half for the topping.

Spread the dulce de leche over the shortbread base and sprinkle over the whole candied nuts.

To Make the Topping:
Melt the chocolate in a heatproof bowl set over a saucepan of barely simmering water. Remove chocolate from the heat and gently stir in the butter, stirring until it is fully blended into the chocolate.

Pour the chocolate over the dulce de leche, smoothing it with a long metal icing spatula, then sprinkle over the rest of the peanuts. Slide the pan into the fridge to set the topping, about 20 minutes; if you’d like to serve the squares cold, keep them refrigerated for at least 3 hours before cutting. Cut into 16 bars.

Sunday, March 2, 2008

Eat to the Beat - Strawberry Wine


(if you are viewing this in GoogleReader, the video won't show up, but you can click the link to see it!)


Elly over at ellysaysopa came up with a GREAT new blogging event! Eat to the Beat challenges it's participants to make something that links to a song, lyrics, band name, etc. I love music and the first thing I thought of was "Strawberry Wine" by Deana Carter. This was actually one of the first country music songs I liked, and lead to an intense love affair with country music.

I started with, well, strawberries and wine (of the Italian sparkling sort), and made a Strawberry Bellini and Strawberry "Champagne" Truffles.

Strawberry Bellini
5 Strawberries, cleaned and stems removed
1/2 cup strawberry liquor
One (750ml) bottle Prosecco

Blend together the strawberries and liqour. Strain out the seeds, combine with chilled prosecco. DRINK. :-)


Strawberry "Champagne" Truffles
I have always used Alton Brown's chocolate truffle recipe for truffles, omitting the brandy and changing the flavor by using different extracts. Recently I started using molds to make them, instead of the traditional rolling into balls and coating. I think that worked best for this recipe, because the ganache center is thinner than usual. I cut down the recipe for testing, so I am going to try to scale it back up to the original amounts and include my adjustments.


Ingredients:
10 ounces semisweet chocolate, chopped fine
3 tablespoons unsalted butter
1/2 cup heavy cream
1 tablespoon light corn syrup
1 1/4 cups Prosecco (Italian sparkling wine)
1 1/4 cups Strawberry Liquor
10 fresh strawberries, cleaned and stems removed
8 ounces semisweet chocolate, chopped fine

Directions:
~Heat the 8 ounces of chopped chocolate in a heat safe mixing bowl. Heat in the microwave in 30 second increment on low power until melted, stirring inbetween. Coat the inside of the molds with a thin layer of chocolate. Set aside the remaining chocolate. Place the molds in the refrigerator to set the chocolate.

~Place the 10 ounces of chocolate and butter in a medium size glass mixing bowl. Microwave for 30 seconds. Remove and stir, and repeat this process 1 more time. Set aside.

~Blend together the strawberries and liqour, then combine with the prosecco. Heat over medium heat in a small sauce pan until reduced by half.

~Heat the heavy cream and corn syrup in a small saucepan over medium heat until simmering. Remove from the heat and pour the mixture over the melted chocolate mixture; let stand for 2 minutes. Using a rubber spatula, stir gently, starting in the middle of bowl and working in concentric circles until all chocolate is melted and mixture is smooth and creamy. Strain the strawberry reduction into the chocolate and stir gently until combined.

~Remove the molds from the refrigerator. Pour the ganache into a ziplock bag, cutting a VERY small tip off the corner. The ganache is very fluid at this stage and will basically come right out of the bag. The smaller the hole, the more control you will have. Fill the molds with the ganache, leaving a little room at the top to seal the candy closed with more chocolate. Place in the refrigerator to set (a good 30 min to an hour should be enough)

~If necessary, re-melt the chocolate by heating for a few seconds at low power in the microwave. Fill the remaining space in the molds with chocolate. Place in the refrigerator to set.

~When the chocolate is completely set, unmold the truffles. Enjoy!

These have a luscious creamy center with a hint of strawberry and wonderful rich chocolate to complement it.


Tuesday, February 26, 2008

TWD: Pecan Sour Cream Biscones...errr I mean Biscuits

Welcome to another Tuesday with Dorie (go here for more)! This week's recipe, Pecan Sour Cream Biscuits, was chosen by Ashley of eat me, delicious.

I knew I was in trouble as soon as saw the recipe... biscuits. I've never made biscuits before; I don't have a biscuit cutter or pastry blender. Dough is not my friend. If a recipe cautions against overhandling, rest assured I will overhandle it. Nevertheless, I set out to conquer these delicious sounding biscuits.

Things were just wrong all over the place. My brown sugar was clumping and when it came to the butter, oh the butter, I was clearly missing something. How does one mush a 1/2 tablespoon chunk of butter into pea-sized bits?! I forged on, doing the best I could. Being completely unimaginative, I simply used a knife to cut out the "rounds" of dough that were soon to become biscuits (though since they are more like scones I have dubbed them "biscones"). I decided that this gave them "character" but I really only succeeded in perpetuating the biscone identity crisis. When they came out of the oven, looking more like an overpuffed cookie than a biscuit, I decided that they still looked darn good enough to eat and dug right in. They certainly were.
See look! They puffed... a little.


From Baking, From My Home to Yours by Dorie Greenspan

Pecan Sour Cream Biscuits (Makes about 12 biscuits)

2 cups all-purpose flour (or 1 3/4 cups all-purpose flour and 1/3 cup cake flour)
1 tablespoon baking powder
1/2 teaspoon salt
1/4 teaspoon baking soda
1/4 cup (packed) light brown sugar
5 tablespoons cold unsalted butter, cut into 10 pieces
1/2 cup cold sour cream
1/4 cold whole milk
1/3 cup finely chopped pecans, preferably toasted

Getting Ready:
Center a rack in the oven and preheat the oven to 425 degrees F. Get out a sharp 2-inch-diameter biscuit cutter and line a baking sheet with parchment or a silicone mat.

Whisk the flour(s), baking powder, salt, and baking soda together in a bow. Stir in the brown sugar, making certain there are no lumps. Drop in the butter and, using your fingers, toss to coat the pieces of butter with flour. Quickly, working with your fingertips (my favorite method) or a pastry blender, cut and rub the butter into the dry ingredients until the mixture is pebbly. You'll have pea-size pieces, pieces the size of oatmeal flakes and pieces the size of everything in between-- and that's just right.

Stir the sour cream and milk together and pour over the dry ingredients. Grab a fork and gently toss and turn the ingredients together until you've got a nice soft dough. Now reach into the bowl with your hands and give the dough a quick gentle kneading-- 3 or 4 turns should be just enough to bring everything together. Toss in the pecans and knead 2 to 3 times to incorporate them.

Lightly dust a work surface with flour and turn out the dough. Dust the top of the dough very lightly with flour, pat the dough out with your hands or toll it with a pin until it is about 1/2 inch high. Don't worry if the dough isn't completely even-- a quick, light touch is more important than accuracy.

Use the biscuit cutter to cut out as many biscuits as you can. Try to cut the biscuits close to one another so you get the most you can out of the first round. By hand or with a small spatula, transfer the biscuits to the baking sheet. Gather together the scraps, working with them as little as possible, pat out to a 1/2-inch thickness and cut as many additional biscuits as you can; transfer these to the sheet. (The biscuits ca be made to this point and frozen on the baking sheet, then wrapped airtight and kept for up to 2 months. Bake without defrosting-- just add a couple more minutes to the oven time.)

Bake the biscuits for 14-18 minutes, or until they are tall, puffed and golden brown. Transfer them to a serving basket.

Saturday, February 23, 2008

Y-U-M


February brings my favorite time of year: Girl. Scout. COOKIES.


Thin Mints + homemade mint chocolate chip ice cream =


Shrimp with Garlic Cream Sauce


Alas, yesterday was another Friday during Lent, which means no meat for dinner. We don't eat a lot of fish because I...basically don't like fish. I can do shrimp every so often, but I didn't want to do the same shrimp scampi that I did last week. Instead, I envisioned spicy shrimp with a garlic cream sauce... so off to Google I went for some inspiration! Here is what I ended up with:

Shrimp with Garlic Cream Sauce
Ingredients
~1.5 tbsp butter
~1 tbsp olive oil
~3 cloves garlic, minced
~1/2 of a shallot, minced (you could use the whole shallot... I like shallots but they don't like me so I try to minimize their use!)
~uncooked shrimp, peeled and deveined (I probably only used 1/4 pound of very small shrimp because I didn't want leftover shrimp. There was plenty of extra sauce so feel free to increase the amount of shrimp)
~spices for shrimp - I use Essence of Emeril, homemade.
~1 plum tomato, pureed
~1/2 cup dry white wine
~1/4 tsp basil
~1/2 cup heavy cream
~1/3 grated Parmesan cheese

Directions
~Melt butter and heat olive oil in saute pan. Add garlic and shallot, cook 1-2 minutes.
~Season shrimp and add to pan. Heat 3-5 min until cooked, them remove from pan.
~Add wine, reduce by half over med-high heat.
~Add tomato puree and basil, simmer over low heat for 5 min.
~Stir in cream, heat through.
~Stir in Parmesan cheese. Add shrimp back to sauce to reheat and allow sauce to thicken.

This was very good! I served it with garlic mashed potatoes and steamed broccoli. We will definitely be having this again!

Platinum Chef Challenge 6: Stuffed Cumin Chicken


The Platinum Chef Challenge (PCC) is back! I love participating in this blogging challenge with the ladies on thenest. For some reason, I can stare at my kitchen/cupboard for hours and not come up with a meal, but give me 5 random ingredients and my mind races! For me, the PCC is just a way to expand my horizons in the kitchen and 'flex my wings,' if you will. I'm not much for creating dishes from scratch, so I like to push myself to come up with new things. In past challenges, I've been able to experience new ingredients, as well.

For the sixth installment of PCC, the ingredients were as follows:
Vanilla
Cumin
Butternut Squash
Barley
Chickpeas

Cumin jumped out at me as a sign for some Middle Eastern cuisine. I did some digging for inspiration and technique, and decided to make Stuffed Cumin Chicken. I created a chicken breast with a honey spice glaze, stuffed with a barley, spinach and chickpea stuffing. I topped them off with a warm vanilla squash yogurt sauce and served along side honey cumin baby carrots.

To make the stuffing:

Ingredients

1/3 cup barley, rinsed
dash salt
1 1/2 cups chicken stock

Drizzle of olive oil
2 cloves garlic, minced
1/4" thick ring of large white onion, diced.
2 oz fresh spinach

1/2 cup chickpeas
Juice from 1/2 of a lemon

1/2 tsp basil
1/4 tsp coriander
1/4 tsp black pepper
1/2 tsp cumin

Directions
~Bring the salt and chicken stock to a boil in a pot. Add barley and cook until tender and slightly chewy, about 45 min/
~Heat oil in a saute pan. Add garlic and onion, cook over medium heat for a few minutes until garlic is fragrant and onion begins to become translucent.
~Add spinach and cook until wilted down.
~Puree the chickpeas in a processor with the lemon juice.
~Combine all barley, spinach, and chickpeas together and add remaining spices.

For the glaze:
Ingredients
2 tsp lemon juice
1 tbsp extra virgin olive oil
1 tbsp white vinegar
3 tbsp honey
1 tsp cumin
1/2 tsp paprika
1 tsp garlic powder
1/2 tsp black pepper

Combine all in a small dish

Preparing the chicken:
~Spray the bottom of a baking dish with nonstick spray.
~Split boneless/skinless chicken breast lengthwise to create a pocket in the middle. Add stuffing to pocket. (I ended up with probably 1/4 cup in each. I made 3 total and had about 1/2 cup stuffing leftover)
~Brush glaze on both sides of chicken
~Place in baking dish and cook in the oven at 375 degrees F until done, about 30 minutes. (I always check that the meat had reached a temp of 160 degrees F with an instant read thermometer).

For the yogurt sauce:
Ingredients
1 cup plain yogurt
1/4 egg white (yes I know this is weird, sorry!)
1 tsp cornstarch
seeds scraped from 1/2 of a vanilla bean
1/4 cup boiled, mashed butternut squash (in retrospect it would have been better to puree this so the sauce didn't have that 'stringy' look).
dash cinnamon

Directions
~Combine the first four ingredients in a saucepan OFF THE HEAT, stir to make sure cornstarch is incorporated. While stirring constantly, place over medium heat.
~Bring yogurt to a boil while stirring constantly. This is to prevent curlding.

~When the yogurt has boiled successfully, you can relax the stirring. Reduce to a simmer, for 3 minutes.
~Stir in squash and cinnamon.
~If a thinner sauce is desired, add some warmed chicken stock to preference.

To serve with the chicken, I steamed some baby carrots and tossed them with a bit of honey and cumin. Plate chicken and serve with warm yogurt sauce.


I think this was my first time really cooking with cumin. Unfortunately, I don't think I really care for cumin... or yogurt sauce. It wasn't bad, and my husband seemed to enjoy it, but I guess it's hard for me to judge where it falls on the scale.

Monday, February 18, 2008

TWD: Almost Fudge Gateau

I am SO excited to now be a part of Tuesdays with Dorie (go here for more!). I received Dorie Greenspan's Baking: From My Home to Yours for Christmas and have been dying to dig in. For this week, Nikki of Crazy Delicious chose the Almost Fudge Gateau. I had a few technical problems along the way (ok, one big one... over beating the egg whites), but in the end it was still edible so I don't think I did too badly. Also, reading over the directions here I realize that I never dusted my pan with flour. Again, it didn't seem any worse for wear and unmolded perfectly from my springform pan.

Almost-Fudge Gâteau
5 large eggs
9 ounces bittersweet chocolate, coarsely chopped
1 cup of sugar
5 tablespoons unsalted butter, cut into chunks
2 tablespoons coffee or water (I used water as no one in my house drinks coffee so I didn't have any)
1/3 cup all-purpose flour
Pinch of salt

For the Glaze (optional)
4 ounces bittersweet chocolate, coarsely chopped
½ cup heavy cream
2 teaspoons light corn syrup

Getting Ready:
Center a rack in the oven and preheat the oven to 350 degrees F. Butter a 9-inch springform pan, line the bottom with parchment paper, butter the paper, dust the inside of the pan with flour and tap out the excess. Place the pan on a baking sheet lined with parchment or a silicone mat.

Separate the eggs, putting the whites in a mixer bowl or other large bowl and the yolks in a small bowl.

Set a heatproof bowl over a saucepan of simmering water and add the chocolate, sugar butter and coffee. Stir occasionally until the chocolate and butter are melted; the sugar may still be grainy, and that's fine. Transfer the bowl to the counter and let the mixture sit for 3 minutes.
Using a rubber spatula, stir in the yolks one by one, then fold in the flour.

Lookin' good so far!


Working with the whisk attachment of the mixer or a hand mixer, beat the egg whites with the pinch of salt until they hold firm, but glossy peaks. Using the spatula, stir about one quarter of the beaten whites into the batter, then gently fold in the rest. Scrape the butter into the pan and jiggle the pan from side to side a couple of times to even the batter.


Here I am... about to over beat the egg whites...


Bake for 35 to 45 minutes, or until the cake has risen evenly (it might rise around the edges and you'll think it's done, but give it a few minutes more, and the center will puff too) and the top has firmed (it will probably be cracked) and doesn't shimmy when tapped; a thin knife inserted into the center should come out just slightly streaked with chocolate. Transfer the pan to a cooling rack and let the cake rest for 5 to 10 minutes.

Run a blunt knife gently around the edges of the cake and remove the sides of the pan. Carefully turn the cake over onto a rack and remove the pan bottom and the parchment paper. Invert the cake onto another rack and cool to room temperature right side up. As the cake cools, it may sink.


Cooling, and not terribly impressive...


To Make the Optional Glaze:
First, turn the cooled cake over onto another rack so you'll be glazing the flat bottom, and place the rack over a baking sheet lined with parchment or wax paper to catch any drips.
Put the chocolate in a small heatproof bowl.


Melt the chocolate over a pan of simmering water or in a microwave oven – the chocolate should be just melted and only warm, not hot. Meanwhile, bring the cream to a boil in a small sauce pan. Pour the hot cream over the chocolate and stir very gently with a rubber spatula until the mixture is smooth and shiny. Stir in the corn syrup.


Pour the glaze over the cake and smooth the top with a long metal icing spatula. Don't worry if the glaze drips unevenly down the sides of the cake – it will just add to its charms. Allow the glaze to set at room temperature or, if you're impatient, slip the cake into the refrigerator for about 20 minutes. If the glaze dulls in the fridge, just give it a little gentle heat from a hairdryer.


I made one mini gateau in a ramekin so I could taste test before bringing this delight to work. I probably would not have done this if it weren't for the over beating part... I was nervous! Clearly, there was no problem with the final product. :-)